 By Ethan Brooks
Updated November 2026
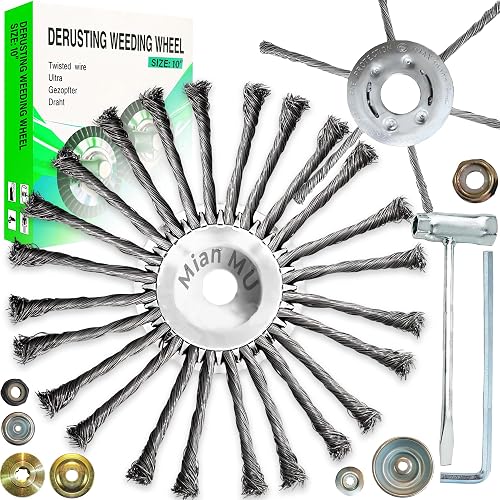
Ryobi weed eater accessories expand what your string trimmer can do, from clean edging to light cultivating and debris cleanup. This guide shows you how to match an attachment to your trimmer’s shaft and drive system, how to change over safely, and which common mistakes to avoid so each attachment works the way it should.
Identify Your Trimmer’s Shaft and Drive Type
Before buying any attachment, check two things on your Ryobi unit: the shaft diameter and whether the drive is straight shaft or a bent shaft design. Most attachments are sold for a specific shaft style, and a mismatch means the accessory won’t seat or won’t turn freely. Look for the model number on the motor housing and compare it with the fitment notes in the product listing.
Shopping for one? See our guide: 6 Best Weed Eater Gas Leaf Blower Combos for Yard Care (2026).
- Straight shaft units use a long, rigid tube and generally accept the widest range of add-on heads.
- Bent shaft units are lighter and more compact, and they usually need attachments built for that drive.
- Check the attachment connector too. Some attachments use a bayonet-style lock, while others use a clamp or screw collar.
Choose Attachments by Task
Think about the job first. A single trimmer can cover several tasks if you pick attachments that match each one.
Edging and Line Control
An edging head or a guard that rides on the lawn surface helps you cut a sharp line along walks and beds. Set the guard so the line sits just above the soil, not dug into it, to avoid gouging the turf.
Cultivating and Light Cleanup
Cultivator heads and small tillers are useful for loosening soil in tight spaces and breaking up thin crusts. Keep them shallow, roughly 1 to 2 inches deep, and avoid running them through established root zones.
Blowing and Sweeping
Some combination systems include a blower tube that clears clippings from patios and driveways. Keep the nozzle low and angled away from people and windows.
How to Change Attachments Safely
- Switch the unit off and remove the battery or disconnect the spark plug boot on a gas unit.
- Wait for any moving parts to stop completely.
- Release the shaft lock or collar, slide off the old head, and wipe the shaft clean of grass and dirt.
- Seat the new attachment fully, then tighten the lock until it does not turn or wobble by hand.
- Run the trimmer briefly at idle to confirm the head spins freely and does not rub the guard.
| Task | Attachment type | Key check |
|---|---|---|
| Edging | Edging head or guard | Line height set above soil |
| Cultivating | Cultivator head | Shallow depth only |
| Clearing debris | Blower tube | Nozzle angled away from people |
Common Mistakes
- Buying an attachment without confirming the shaft diameter and drive type.
- Skipping the idle test after installation, which can hide a loose lock.
- Cultivating too deep and hitting tree roots or irrigation lines.
- Forcing a connector that does not seat, which can crack the shaft housing.
- Leaving grass wrapped around the drive shaft, which overheats the drive and shortens its life.
Recommended Gear
A clean, dedicated work surface makes attachment swaps quicker. Keep a stiff brush handy for clearing the shaft and drive area after each job.
Trimmer line matched to your head type keeps edges sharp and reduces wear on the guard. View on Amazon
A pair of work gloves protects your hands when you handle hot or sharp attachment parts and clear wrapped debris. View on Amazon
FAQ
Can I use any Ryobi attachment on any Ryobi trimmer?
No. Check the shaft diameter, drive style and connector type first, because attachments are built for specific trimmer designs. Use the model number to confirm fitment before you buy.
How deep should a cultivator attachment dig?
Keep cultivating shallow, roughly 1 to 2 inches, to avoid damaging roots and buried lines. Make several light passes rather than one deep one.
Why does my attachment wobble after installation?
The lock or collar is probably not fully tightened or the head is not seated all the way. Remove it, reseat it, and retighten before running the unit again.
Conclusion
Matching ryobi weed eater accessories to your trimmer’s shaft and drive, and choosing each one by task, keeps your edges clean and your equipment running well. Follow the safe swap steps and check each attachment at idle before you work. For model-specific fitment, confirm details with the manufacturer or an authorized service dealer.
Related reading
- Weed Eater Echo Parts: How to Find, Identify and Replace the Right Ones
- Weed Eater Battery Powered: How to Choose and Use One for Clean Trims
- Tiller Attachments for Weed Eaters: How to Choose and Use Them (2026)
- Parts for Toro Weed Eater (2026): Which Should You Choose?
Ready to choose one?
About Ethan Brooks
Ethan Brooks is part of our editorial team and reviews and edits our lawn edging & trimming guides, checking product details against manufacturer specifications and owner feedback.