By Owen Hayes
Colmet metal landscape edging is a thin, rigid strip of metal that sets a firm boundary between your lawn and beds, mulch, or gravel. When it is installed at the right height, staked securely, and set on a level base, it keeps turf from creeping into planting areas and gives your yard a sharp, finished edge. This guide walks through planning, measuring, trenching, setting, and checking your work so you can get a clean result on the first try.
What Colmet Metal Landscape Edging Does Well
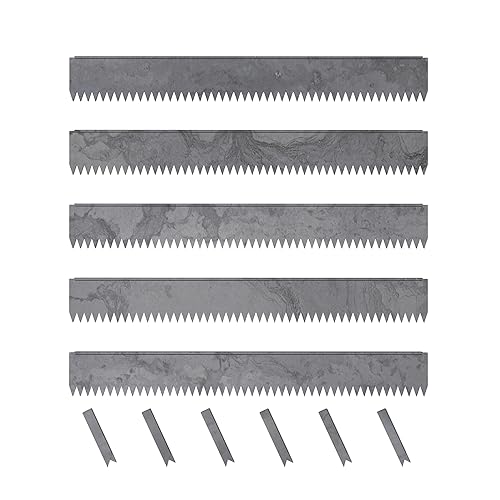
Metal edging works best where you want a low, almost invisible barrier. Unlike wood or stone, a metal strip takes up very little visual space, so the lawn appears to flow straight into the bed. Colmet metal landscape edging is typically sold in roll or straight-length form and is meant to be pressed into soil and secured with stakes or anchors. Because the profile is narrow, it is well suited to tight curves and simple geometric designs.
Shopping for one? See our guide: 6 Best Metal Landscape Edging Material Options for Clean Lawn Lines.
Metal edging does have limits. It will not stop roots from tunneling underneath if the strip is set too shallow, and it can be pushed out of line by frost heave or heavy mower wheels if it is not anchored well. Plan for those realities and the rest of the work becomes much easier.
Tools and Materials You Will Need
Gather everything before you open the first roll. Stopping mid-trench to hunt for a stake wastes time and can leave you with a gap that is hard to hide.
- Colmet metal edging strips (measure the full run, then add 10 percent for overlaps and cuts)
- Landscape stakes or anchor spikes, usually one every 12 to 18 inches, with extra for corners
- Flat spade or edging spade for cutting a clean trench
- Garden hose or marking paint for laying out the line
- Tape measure and stakes or wooden pegs for layout
- Rubber mallet for seating strips and driving anchors
- Metal snips or a cutoff tool rated for thin steel or aluminum
- Level, preferably a 4-foot or longer straightedge
- Landscape fabric (optional, for beds where weeds are a concern)
- Gloves and eye protection, since cut metal edges are sharp
Step 1: Plan the Layout and Mark the Line
Start by deciding exactly where the edge will run. Use a garden hose to lay out curves, because it bends smoothly and lets you step back and check the flow from the house or sidewalk. For straight runs, set stakes at each end, stretch a string line tight between them, and mark the edge with spray paint or a line of sand.
Check the Curves
For gentle curves, keep the radius at least 3 feet wherever possible. Tighter bends make the strip buckle and are harder to hold at the right height. If you must go tighter, score the strip lightly on the inside of the curve and bend it slowly by hand before setting it.
Account for Slope
On sloped ground, trench on the uphill side will be shallower than the downhill side. Work in sections no longer than about 10 feet at a time so you can check level and depth as you go.
Step 2: Dig the Trench to the Correct Depth
Dig a trench along the marked line that is just deep enough for the strip to sit with its top edge about 1 inch above the finished grade of the lawn side. For most residential installations this means a trench roughly 4 to 6 inches deep, depending on the height of the strip you are using. The trench should be slightly wider than the strip so you can slide it in without forcing it.
Keep the trench walls as vertical as you can. Slanting walls leave soil pockets that settle later and can tilt the edge.
Remove Debris and Level the Base
Pull out rocks, roots, and old turf from the trench bottom. Tamp the soil lightly so the strip rests on firm ground rather than loose fill. Low spots are the most common reason a metal edge later bows or rises.
Step 3: Set the Strip and Anchor It
Lower the strip into the trench, keeping the top edge at the target height. Work with the bed side soil if you need to raise a section, and tamp the backfill as you go. Once a section is in place, drive stakes or anchors through the strip at the planned spacing. Stakes should be driven straight down, not angled, and their heads should sit slightly below the top edge so they do not catch the mower.
Use a level along the top edge every few feet. Small adjustments are easy now and very difficult after the soil is packed.
Join Sections Cleanly
Where two strips meet, overlap them by about 2 inches or use the connector pieces the manufacturer supplies. Drive a stake within 3 inches of each joint so the seam does not separate under pressure.
Step 4: Backfill and Finish the Edge
Backfill the bed side first, then the lawn side. Pack soil firmly against the strip so there are no air pockets. Water the area lightly to settle the fill, then top off any low spots. The finished soil should sit just below the top edge on the lawn side and at or just below it on the bed side, depending on how you want mulch to lie.
Final Checks
- Walk the full length and look for bowing, kinks, or uneven height
- Press on the top edge to confirm no section flexes
- Confirm every stake is seated and not protruding above the strip
- Run the mower or trimmer along the edge to check clearance
Common Mistakes to Avoid
| Mistake | What Happens | How to Prevent It |
|---|---|---|
| Trench too shallow | Strip rises, turf grows over the top | Dig to the depth needed for the strip height plus about 1 inch |
| Too few stakes | Edge bows or heaves after freeze-thaw | Space stakes 12 to 18 inches apart and add extras at curves |
| Skipping the level check | Wavy, uneven line | Check every 4 to 6 feet with a straightedge |
| Forcing tight curves | Kinks and buckling | Keep radius generous and bend slowly |
| Leaving sharp cut ends | Injury during maintenance | File or bend cut edges and wear gloves |
Another frequent error is backfilling too quickly without tamping. Loose soil settles over the first few weeks, and that settling tilts the strip. Take the extra five minutes to firm each section as you go.
Tips for a Longer-Lasting Result
- Install in mild weather when soil is workable but not saturated
- Use landscape fabric along the bed side to slow weed growth under the strip
- Re-check stakes once a year, especially after the first winter
- Set the strip slightly lower in heavy clay soil, where frost movement is more likely
Recommended gear
A sturdy edging spade makes trenching far easier than a standard shovel, especially in compacted soil. Look for a flat, straight blade that can cut a clean vertical wall.
Metal snips rated for thin steel or aluminum produce clean cuts without deforming the strip. Avoid using bolt cutters, which crush the metal.
A rubber mallet seats the strip evenly and drives stakes without denting the top edge.
A 4-foot aluminum level helps you keep the top edge consistent over long runs and on slopes.
FAQ
How deep should colmet metal landscape edging be installed?
Most installations sit with the top edge about 1 inch above the lawn grade. The trench depth depends on the strip height, but it is typically 4 to 6 inches for common residential profiles. Check the manufacturer’s specifications for your exact product.
How far apart should the stakes be?
A spacing of 12 to 18 inches works for most runs. Use closer spacing on curves, at joints, and on slopes where movement is more likely.
Can I install metal edging in winter?
It is better to wait for workable soil. Frozen ground is difficult to trench, and freeze-thaw cycles can push a newly set edge out of alignment.
How do I cut colmet metal edging to length?
Use metal snips rated for thin steel or aluminum. Cut slowly to avoid bending the strip, then smooth the cut edge with a file or bend it slightly inward so it does not catch on skin during later work.
Will metal edging stop tree roots?
It can slow roots at the surface, but it is not a reliable root barrier. Roots growing deep below a shallow strip can still pass underneath. For severe root pressure, consider a deeper barrier or consult a certified arborist.
Can I install it in clay soil?
Yes, but clay expands and contracts with moisture, so anchor the strip with more stakes and check alignment after heavy rain or freezing weather.
Do I need landscape fabric with metal edging?
Fabric is optional. It helps limit weeds growing along the bed side of the strip, particularly in areas where you plan to use mulch rather than dense planting.
Conclusion
Clean metal edging comes down to three things: a trench at the right depth, a level and firmly seated strip, and enough stakes to hold the line through seasons of freezing and mowing. Plan the layout, work in short sections, and check your work as you go. A careful installation will keep its crisp line for years with very little upkeep.
Related reading
- Metal Landscape Edging Nearby: How to Find and Choose the Right Option
- Metal Landscape Edging Col Met: 5 Best Options for Clean Lawn Lines
- Heavy Duty Metal Landscape Edging Review (2026): Is It Worth It?
- Brown Metal Landscape Edging: Install It Straight in 7 Steps
- 9 Best Flexible Metal Landscape Edging Options for Clean Lawn Lines (2026)
- 9 Best Corten Metal Landscape Edging Options for Clean Lawn Lines
Ready to choose one?

About Owen Hayes
Owen writes about lawn edging & trimming. Each guide starts with research into how products are built and what owners report after months of use, and is revised when better options appear.