By Owen Hayes
Installing metal landscape edging is a manageable weekend project that gives your beds and lawn borders a crisp, permanent line. In this guide, you will learn how to install metal landscape edging from start to finish: planning the layout, cutting and shaping the strips, setting them at the right height, staking them securely and backfilling so the edge stays put for years. The process takes patience more than strength, and the steps below will help you get a straight or gently curved edge the first time.
What You Need Before You Start
Gather your materials and tools before you dig. Stopping mid-trench to hunt for a stake or a hacksaw wastes time and can leave your soil exposed for hours. Most DIY installs use the same basic kit regardless of whether you chose steel, aluminum or a corten-style product.
Shopping for one? See our guide: 6 Best Metal Landscape Edging Material Options for Clean Lawn Lines.
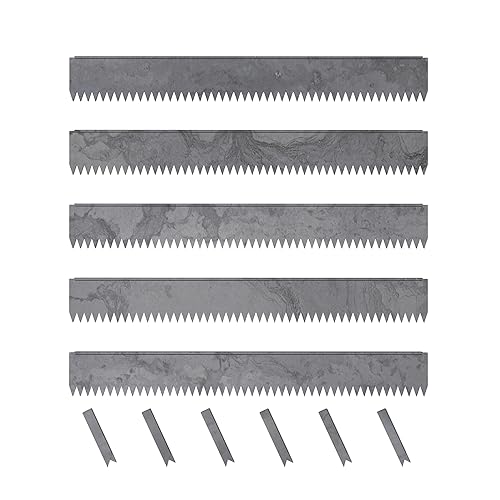
- Metal edging strips, typically 4 to 6 inches tall and sold in 8-foot or 10-foot lengths
- Matching stakes or spikes, usually one every 12 to 18 inches on straight runs and closer on curves
- Flat-blade spade or edging spade for cutting a clean trench
- Garden hose or a length of rope, for laying out the curve before you dig
- Landscape marking paint or flour, for tracing the line on the ground
- Tin snips or a metal-cutting blade for a reciprocating saw, for trimming strips to length
- Rubber mallet or dead-blow hammer, to drive stakes without denting the metal
- Level, preferably a 4-foot straightedge with a torpedo level
- Landscape fabric (optional), to suppress weeds along the edge
- Gravel or sand (optional), for a thin base under the strip in wet or heavy soil
Step 1: Plan the Layout and Mark the Line
Decide where the edge will run and how it will look. Straight edges follow a string line stretched between two stakes. Curved edges look best with long, sweeping arcs rather than tight bends, since metal strips resist sharp turns. Lay your garden hose on the ground in the shape you want and step back from several angles before committing.
Once the shape is right, trace it with marking paint or a line of flour. Check that the bed is wide enough for your plantings and that the line sits far enough from the lawn mower path, usually at least 3 inches so the wheels do not ride on the metal.
Step 2: Cut and Shape the Metal Strips
Measure each run and cut the strips to length. Leave a small overlap of about 2 inches where two pieces meet, and nest one end inside the other so the joint stays flush. For cutting, tin snips work well on thinner aluminum, while steel strips are usually easier to cut with a metal-blade reciprocating saw or a bench shear. Wear gloves and eye protection, because cut edges can be sharp.
For curves, bend the strip gently by hand along the layout. If it resists, pressing it against the ground while you gradually work along the arc is safer than forcing a tight bend. Avoid kinking the metal, since a crease shows and weakens the strip.
Step 3: Dig the Trench to the Correct Depth
Cut a trench along your marked line with a flat spade. The trench should be just wide enough for the strip, with the strip sitting on the bottom and the top edge standing above grade. A common target is to set the strip so that about 1 inch shows above the soil on the lawn side, which keeps grass from creeping over while still letting a mower wheel roll across the top if needed. Many installers bury the strip about 2 to 3 inches deep, but check the specific product guidance, since depth requirements vary by height and model.
Keep the trench walls vertical. Angled walls push the strip outward and leave gaps that let soil and grass roots slip through. Remove rocks and roots that could push the strip out of line later.
Step 4: Set the Strip and Check Alignment
Place each strip into the trench and check it with your level and straightedge. For straight runs, sight down the top edge and adjust until it is parallel with your string line. For curves, step back and look at the flow of the arc, then fine-tune by pressing or easing the strip with your hands. Set the top edge at the height you want all the way along, because a wavy top looks sloppy even when the curve is correct.
If you plan to add a thin base layer, spread 1 to 2 inches of compacted sand or pea gravel in the bottom of the trench first. This helps in clay soil that holds water and heaves in winter.
Step 5: Stake the Edging Securely
Drive stakes through the holes or along the outside of the strip, depending on the design. Use a rubber mallet to tap each stake down until its top is just below the top edge of the metal. Driving stakes too far down can crush the strip, while leaving them high creates a trip point. Space stakes about 12 to 18 inches apart on straight sections and closer on curves, typically every 8 to 12 inches, so the strip holds its shape when the soil shifts.
Check alignment again after the first few stakes. It is much easier to correct a small shift now than after the whole run is set.
Step 6: Join Sections and Finish the Ends
At joints, overlap the strips as described earlier and drive one stake directly through the overlap. Keep the top edges flush by tapping the joint with the mallet. Where a run ends, cap it with a stake placed close to the terminal end so the metal cannot flex or lift. Trim any sharp corners with a file or grinder to prevent cuts during future mowing and weeding.
Step 7: Backfill, Compact and Finish the Lawn Side
Backfill the trench on both sides of the strip with soil, pressing firmly as you go to remove air pockets. On the bed side, mulch or plant right up to the metal. On the lawn side, fill any gap so the soil is level with the top of the strip, then seed or sod to meet the edge cleanly. Water the area lightly to settle the soil.
Planning Table: Stake Spacing and Depth by Layout
| Layout type | Suggested stake spacing | Typical burial depth | Notes |
|---|---|---|---|
| Long straight run | 12 to 18 inches | 2 to 3 inches | Check alignment every few stakes with a string line |
| Gentle curve | 8 to 12 inches | 2 to 3 inches | Use closer stakes where the arc tightens |
| Tight curve or corner | 6 to 8 inches | 2 to 3 inches | Consider a shorter piece or a different product type |
| Heavy or wet soil | Same as above | Add 1 to 2 inches of sand or gravel base | Improves drainage and reduces heaving |
Always confirm the exact spacing and burial depth in the manufacturer’s installation instructions, since they differ between products.
Tips for a Clean, Lasting Edge
- Install on slightly moist soil. Dry, hard ground is difficult to trench cleanly, and very wet soil smears.
- Work in short sections so the trench stays open for minimal time.
- Use a single continuous string line for straight runs, and re-check it after every few stakes.
- Leave a consistent gap for mower wheels, even if you plan to trim by hand.
- Store leftover strips flat and dry to prevent kinks before your next project.
Common Mistakes to Avoid
Most failed installs come from a few repeat errors. The first is setting the strip too high, which looks neat at first but shifts as the soil settles and leaves a gap underneath. The second is skipping stakes on curves, where the metal springs back and pulls the line out of shape. The third is driving stakes unevenly, which tilts the strip and creates a wavy top. Finally, many people backfill loosely, and the strip then wobbles when stepped on. Take your time on these points and the edge will hold.
If you are still deciding which style suits your yard, compare options in Metal Landscape Edging Nearby: How to Find and Choose the Right Option before buying. For a shorter, lower profile, 6 Inch Metal Landscape Edging: A Step-by-Step Installation Guide covers that specific height in detail.
Recommended gear
A reliable set of tools makes the install faster and more accurate. The items below are commonly used for this kind of work.
- Flat-blade edging spade: A flat, straight-sided blade cuts clean trench walls that hold the strip upright. View on Amazon
- Rubber mallet: Drives stakes without denting or splitting the metal. View on Amazon
- Torpedo level with a 4-foot straightedge: Helps you confirm the top edge is level or follows the intended slope. View on Amazon
- Metal-cutting reciprocating saw blade: Makes straight, clean cuts through steel edging strips. View on Amazon
FAQ
How deep should metal landscape edging be installed?
Most installs bury the strip about 2 to 3 inches, leaving roughly 1 inch of the top visible on the lawn side. Confirm the exact depth in the product instructions, since taller strips may need deeper setting.
How far apart should the stakes be?
On straight runs, space stakes about 12 to 18 inches apart. On curves, use about 8 to 12 inches, and closer on tight arcs, so the strip keeps its shape.
Can I install metal edging on a curve?
Yes, as long as the curve is gradual. Bend the strip gently by hand and add stakes more frequently. Very tight curves may need a shorter piece or a different product.
Do I need a gravel base under metal edging?
A base is not always required, but 1 to 2 inches of sand or pea gravel helps in clay or wet soil by improving drainage and reducing movement from frost.
How do I join two pieces of metal edging?
Overlap the ends by about 2 inches, keep the top edges flush, and drive a stake through the overlap to lock the joint in place.
Will the lawn mower damage metal edging?
Properly set edging usually stays intact, but a mower wheel that rides directly on a raised top can bend it over time. Keeping a small gap between the wheel and the strip reduces this risk.
Should I hire a professional for this job?
Many homeowners complete a straight run or simple bed border on their own. For large, complex, or heavily sloped projects, or if underground utilities are a concern, consult a professional landscaper, and call 811 before digging.
Conclusion
Installing metal landscape edging comes down to careful layout, a clean trench, correct height and firm staking. Take time with the marking and alignment steps, since they determine how the finished line looks for years. With the right tools and a steady hand, you can create a crisp, durable border that keeps mulch in the bed and grass on the lawn.
Related reading
Ready to choose one?

About Owen Hayes
Owen writes about lawn edging & trimming. Each guide starts with research into how products are built and what owners report after months of use, and is revised when better options appear.