By Owen Hayes
Learning how to cut metal landscape edging lets you shorten strips to fit curves, corners, and odd-length runs without ruining the finish or leaving sharp edges behind. With the right blade, a few measurements, and a couple of finishing passes, you can make clean, square cuts on steel or aluminum edging in a single afternoon. This guide walks through the tools, the cutting methods, and the cleanup steps that keep your borders looking sharp.
Know What Kind of Metal You Are Cutting
Before you pick up a tool, identify the material. Most metal landscape edging falls into a few families, and each responds differently to cutting.
Shopping for one? See our guide: 6 Best Metal Landscape Edging Material Options for Clean Lawn Lines.
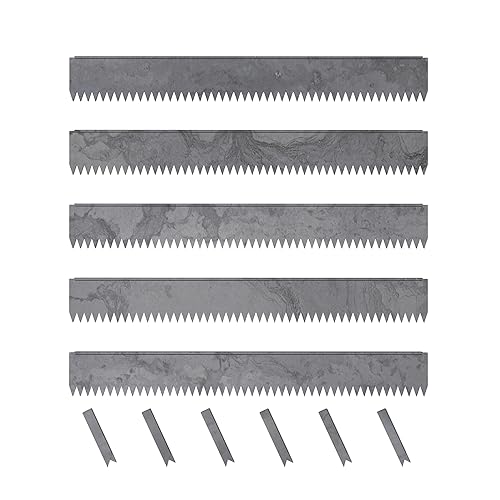
- Steel edging (including galvanized and Corten or weathering steel) is tough and holds its shape, but it is harder to cut and wears blades faster.
- Aluminum edging is lighter and cuts easily, but it gums up abrasive blades and can smear if you push too hard.
- Flexible or thin-gauge metal bends under pressure, so it needs to be supported on both sides of the cut line.
Check the packaging or product sheet for the gauge (thickness) and material. Thicker steel above roughly 14 gauge takes noticeably more effort and benefits from a dedicated metal-cutting blade rather than a general-purpose one.
Tools and Supplies You Will Need
Gather everything before you start so you are not hunting for a clamp while the blade is spinning.
- Tape measure and a fine-tip marker or scribe
- Combination square or speed square for marking a straight line
- Angle grinder with a cut-off wheel, or a reciprocating saw with a metal blade, or a hacksaw for thin stock
- Metal-cutting abrasive wheel rated for the grinder’s RPM
- Safety glasses, hearing protection, and cut-resistant gloves
- Clamps or a bench vise to hold the edging steady
- Mill file or deburring tool
- Rubber mallet and a stake or spike if you will reinstall the piece
- Painter’s tape or a scrap piece of wood to protect nearby surfaces
Step-by-Step: How to Cut Metal Landscape Edging
Step 1: Measure and mark the cut
Lay the strip where it will sit and measure the exact length you need. Add nothing for the cut itself, because most abrasive wheels remove roughly 1/8 inch of material, and many blades remove slightly more. Mark the cut line all the way around the strip using a combination square so the line is perpendicular to the length. If you need a mitered or angled end for a corner, mark that angle with a protractor or by matching the adjoining piece.
Step 2: Secure the edging
Clamp the strip to a stable surface so the cut line sits just beyond the edge of the bench or sawhorse. Place support under the offcut so it does not drop and pinch the blade. For flexible edging, support the piece at least 12 inches on each side of the cut. Never hold metal edging in your hands while cutting.
Step 3: Protect the surroundings
Cutting throws hot sparks, especially with steel and abrasive wheels. Move dry leaves, mulch, and paper away from the work area. If you are cutting on a lawn or near a patio, lay down a sheet of plywood or cardboard. Keep a bucket of water nearby for quick cooling if sparks land somewhere they should not.
Step 4: Make the cut
Put on your eye and ear protection and gloves, then start the tool at full speed before the blade touches the metal.
- Angle grinder: Use a thin cut-off wheel and let the wheel do the work. Make a shallow starter groove first, then deepen it in 2–3 passes. Do not rock the grinder side to side, because that can crack the wheel.
- Reciprocating saw: Use a fine-tooth metal blade, roughly 18–24 TPI (teeth per inch). Keep the shoe firmly against the material and cut with steady, moderate pressure.
- Hacksaw: Ideal for thin aluminum or light-gauge steel. Use a 24 TPI blade and maintain a slow, full-length stroke.
Keep the cut line visible and steer toward the waste side of the mark. Let the tool cool between long cuts to prevent blade warping and discoloration.
Step 5: Deburr the cut edge
A fresh cut leaves a sharp burr that can cut hands and snag shoes. Run a mill file or deburring tool along the cut edge at roughly a 45-degree angle, removing the burr without rounding the corner too much. Wipe away metal dust with a rag.
Step 6: Check fit and reinstall
Set the piece back into the trench and check the fit against your adjacent strips. If the cut is slightly long, take a small amount off with the file rather than re-cutting. Once it fits, secure it with stakes or spikes, tapping gently with a rubber mallet so you do not dent the top edge.
Cutting Methods Compared
The right method depends on the metal thickness, the number of cuts, and how clean the finish needs to be.
| Method | Best for | Finish quality | Main drawback |
|---|---|---|---|
| Angle grinder with cut-off wheel | Steel, many cuts, fast work | Rough, needs deburring | Heavy sparks and heat |
| Reciprocating saw with metal blade | Steel and aluminum, awkward angles | Moderate, slight burr | Vibration and blade wear |
| Hacksaw | Thin aluminum, few cuts | Clean with a fine blade | Slow on thick stock |
| Tin snips | Very thin, light gauge only | Good on soft metal | Can distort the strip |
Common Mistakes to Avoid
- Cutting without support. Unsupported metal can bind the blade, kick back, or bend out of shape.
- Forcing the blade. Pushing hard overheats the wheel and can cause it to shatter.
- Skipping deburring. Sharp edges are the most common injury and the most common reason a border looks unfinished.
- Using the wrong abrasive. A wood or masonry blade will load up or fail on metal.
- Measuring from the wrong end. Always mark from a single reference point, or cumulative errors add up across the run.
- Cutting in the rain or on wet grass. Water can spread sparks unpredictably and creates slip hazards.
Tips for Cleaner, Faster Cuts
- Cut a little long, then trim to fit. It is easier to file away a few millimeters than to replace a short piece.
- Mark the cut line on both faces of the strip so you can see alignment even if the strip shifts.
- For multiple identical pieces, clamp a stop block on your work surface so every cut matches.
- Spray a light coat of cutting lubricant or water on aluminum to reduce smearing (follow the manufacturer’s guidance for your blade).
- Store offcuts carefully; they can be reused for short corner pieces or stakes if the length allows.
If you are still choosing edging for a new project, the guide Metal Lawn Edging: Steel and Aluminum Pros and Cons covers the trade-offs between materials, and Brown Metal Landscape Edging: Install It Straight in 7 Steps walks through installation after cutting. For a 6-inch profile, 6 Inch Metal Landscape Edging: A Step-by-Step Installation Guide is a useful companion.
Recommended gear
- Cut-off wheels for angle grinders: Thin metal-cutting abrasive discs are the most common tool for steel edging, and they cut quickly when matched to your grinder’s RPM rating. View on Amazon
- Bi-metal reciprocating saw blades: A fine-tooth bi-metal blade handles both steel and aluminum and resists breaking when the blade flexes. View on Amazon
- Metal deburring tool: A hand file or deburring tool removes sharp burrs quickly and keeps edges safe to handle. View on Amazon
- Cut-resistant gloves: Gloves rated for cut resistance protect your hands from the sharp edges that appear after cutting and handling thin-gauge strips. View on Amazon
FAQ
Can I cut metal landscape edging with tin snips?
Yes, but only for very thin, light-gauge aluminum or soft metal. Heavier steel will distort and leave a ragged edge, so use a grinder, reciprocating saw, or hacksaw for those.
What blade should I use to cut steel edging?
Use a metal-rated abrasive cut-off wheel on an angle grinder or a bi-metal reciprocating saw blade with fine teeth. Avoid wood or masonry blades, which are not designed for metal.
How do I keep aluminum from smearing when I cut it?
Use a sharp blade, moderate pressure, and a light coat of cutting lubricant or water if the blade manufacturer allows it. Slow, steady cutting also helps prevent the metal from melting onto the blade.
Do I need to wear a respirator when cutting metal?
For most outdoor edging work, safety glasses, hearing protection, and gloves are sufficient. If you are cutting galvanized or coated steel in an enclosed space, or grinding for long periods, consider a particulate respirator. Consult a professional or the product’s safety data sheet if you have concerns about exposure.
How much should I leave for the cut when measuring?
Measure to your exact finished length, then account for the blade kerf, which is typically about 1/8 inch with an abrasive wheel. Mark the line on the waste side so the finished piece lands on the exact measurement.
Can I cut metal edging while it is already installed?
It is possible but harder to control. Remove the section when you can, because cutting in place risks damaging surrounding turf, stakes, and nearby surfaces. If you must cut in place, protect the area and support the strip carefully.
How do I remove the burr after cutting?
Run a mill file or deburring tool along the cut edge at about 45 degrees until the sharp lip is gone. Then wipe the edge clean. A few light passes are usually enough.
Is it safe to cut galvanized edging?
Cutting galvanized steel with an abrasive wheel releases zinc fumes, so work outdoors with good airflow and avoid breathing the dust. Follow the manufacturer’s safety data for the specific product, and consult a professional if you have respiratory concerns.
Conclusion
Cutting metal landscape edging is straightforward once you identify the material, mark the line precisely, and support the strip well. Choose a blade suited to steel or aluminum, cut at a steady pace, and always deburr the edge before installing. With those habits, your borders will look crisp, fit tightly, and stay safe to handle for years.
Related reading
Ready to choose one?

About Owen Hayes
Owen writes about lawn edging & trimming. Each guide starts with research into how products are built and what owners report after months of use, and is revised when better options appear.