 By Caleb Morgan
Updated November 2026
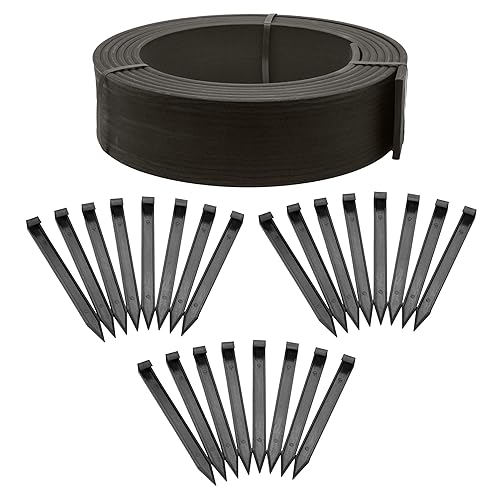
Duraedge steel landscape edging is a flexible steel strip that separates your lawn from beds, paths, and patios. Installed correctly, it keeps grass roots out of mulch, holds clean curves, and makes mowing and string trimming far less frustrating. This guide walks through planning the layout, cutting and joining the strips, setting them at the right depth, and finishing the border so it stays put for years.
What Duraedge Steel Edging Is and Where It Works Best
Duraedge is a brand name for a coated steel edging product sold in rolls and straight lengths. The steel is flexible enough to bend around gentle curves but stiff enough to hold a line once staked. Most homeowners use it along lawn-to-bed transitions, around tree rings, and between gravel paths and turf. It is less suited to tight, sharp corners or very wet, poorly drained soil where the steel can shift over time.
Shopping for one? See our guide: 7 Best Steel Edgings for Landscape Options for Clean Lines (2026).
Before you buy material, measure the total run you need. Add roughly 10 percent for waste, cuts, and overlaps. If you are unsure which material fits your yard, compare options in What Are the Best Options for Landscape Edging? 7 Choices Compared and look at how steel stacks up against alternatives in 7 Best Steel Edgings for Landscape Options for Clean Lines (2026).
Tools and Materials You Will Need
Gather everything before you start digging. Interrupting the job to hunt for a stake usually means the trench has dried out or the grass has settled into the wrong line.
- Duraedge steel edging strips, plus the matching stakes and connectors
- Garden hose or marking paint for laying out the curve
- Flat spade or half-moon edger for trenching
- Rubber mallet or dead-blow hammer for setting the strips
- Level, preferably a 4-foot straightedge for checking the top edge
- Tape measure and a utility knife or tin snips for trimming
- Gravel or sand, about 1 inch deep, if your soil drains poorly
Step 1: Lay Out the Border Line
Mark the path with a garden hose first. Walk away from the bed and look at the curve from several angles. Smooth, gradual arcs look better than tight bends, and a line that looks straight from the patio often reads wavy from the lawn. Once you are happy with the shape, trace it with marking paint or a line of sand.
Check the width of your mower path and string trimmer reach. Leave at least 3 inches of clearance between the edging and any plant stems so the trimmer head does not nick the bed-side plants.
Step 2: Trench to the Correct Depth
Dig a trench along the marked line about 2 inches wider than the steel and deep enough that the top of the strip sits roughly 1/2 inch above the soil or turf surface. Most installers aim for a trench 4 to 5 inches deep so the strip sits in firm subsoil and can be backfilled cleanly. Keep the bottom of the trench level from side to side so the strip does not lean.
If your soil is heavy clay or stays soggy, add 1 inch of sand or fine gravel to the bottom. This helps water drain away from the steel and reduces frost heave in colder regions.
Cutting the Edge to Length
Duraedge strips can be cut with tin snips or a fine-tooth metal blade. Mark the cut line, support both sides of the strip so it does not flex, and cut through in one clean motion. Wear gloves, since cut steel edges are sharp.
Step 3: Set the Strips and Connect Them
Lay the first strip in the trench and check that it sits at your target height. Slide the next section onto the connector, then continue the run. Keep the top edge consistent by checking with a level every 4 to 6 feet along straight sections and more often on curves.
Staking Spacing and Method
Drive stakes through the pre-punched holes at roughly 12- to 18-inch intervals on straight runs and closer, about 8 to 12 inches, on tight curves. Set each stake at a slight angle toward the lawn side so it pulls the strip down and holds it against the trench wall. Drive stakes until the head sits flush with or just below the steel top.
Step 4: Backfill and Check the Line
Backfill the trench on both sides, tamping the soil lightly with your hands or the back of the spade. Do not pack it so hard that the strip bows. Walk the full length, checking that the top edge is even and that no section has popped up or sunk.
If you are working in areas with irrigation lines or buried utilities, locate them before digging. Calling 811 before you dig is the standard step in the United States and is free.
Step 5: Finish the Surrounding Surfaces
Once the steel is set, fill the bed side with mulch or soil and reseed or sod the lawn side as needed. Water both sides so the soil settles around the strip. Re-check the level after the first watering, since settling can shift a section slightly.
Step 6: Trim and Maintain the Border
Run your string trimmer along the top edge at a slight angle, keeping the line just above the steel. Mow the lawn side so the mower deck clears the top of the strip. Every few months, check for stakes that have heaved out, especially after heavy rain or freeze-thaw cycles, and re-drive them.
Step 7: Plan for Long-Term Clean Lines
Steel edging holds its shape well, but grass can still creep under or over it if the lawn side is not kept tidy. Mulch the bed side to a consistent depth and keep the top of the strip free of soil buildup. A small amount of seasonal attention keeps the line sharp for years.
Common Mistakes
- Trenching too shallow. A strip sitting on the surface moves easily and looks unfinished.
- Skipping the level check. Small dips become obvious once mulch is added.
- Using too few stakes on curves. Curves pull the strip outward, so they need closer stake spacing.
- Driving stakes too far down. Stakes sunk below the top edge can make the steel bow.
- Ignoring drainage. Standing water behind the strip can push it out of line over time.
Tips for a Cleaner Finish
- Install in soil that is moist but not saturated, which is easier to dig and backfill.
- Use a string line for long straight runs and check it against the level.
- Cut the strip ends at a slight angle where sections meet to make joints less visible.
- Keep a spare stake or two on hand for future repairs.
Recommended gear
A sturdy half-moon edger helps you cut a clean trench line before you set the strip, and it works well alongside a flat spade for backfilling. View on Amazon
A 4-foot aluminum level makes it easier to check the top edge along long runs without relying on your eye. View on Amazon
Heavy-duty tin snips rated for steel will cut edging strips cleanly without bending the metal. View on Amazon
FAQ
How deep should duraedge steel edging be installed?
Most installs set the strip so the top sits about 1/2 inch above the surrounding soil or turf. Trench 4 to 5 inches deep to give the steel firm support and room for backfill.
How far apart should the stakes be?
Space stakes about 12 to 18 inches apart on straight sections and 8 to 12 inches apart on curves. Closer spacing keeps the strip from bowing outward.
Can I install it on top of the grass?
You can, but a strip laid on the surface is easy to kick out of line and rarely looks clean. Trenching is the better long-term choice.
Does steel edging rust?
Coated steel resists rust for many years, but scratches and cut ends can eventually show surface corrosion. Inspect the strip periodically and touch up damaged areas if needed.
Can I cut duraedge edging with a regular saw?
Tin snips or a fine-tooth metal blade work better. Abrasive cutting wheels can damage the protective coating and leave hot spots.
How do I fix a section that has popped up?
Pull the stakes, reset the strip to the correct height, and re-drive the stakes. Backfill and tamp lightly, then check the level again.
Is steel edging safe around pets and kids?
Cut ends can be sharp before they are capped or tucked into the soil. Smooth any rough edges and keep the top of the strip below or flush with the surrounding grade where possible. If you have questions about materials around children or animals, a local landscaper or installer can advise you.
Conclusion
Duraedge steel landscape edging rewards careful planning. Lay out a smooth curve, trench to the right depth, set stakes at proper spacing, and check the level as you go. With a little routine maintenance, the border will hold its line and keep your lawn and beds clearly defined.
Related reading
- Stainless Steel Edging Landscape: A Step-by-Step Guide to Clean Borders
- Powder Coated Steel Landscape Edging: A Step-by-Step Install Guide
- Corten Steel Landscape Edging: A Step-by-Step Guide to Clean Borders
- Col-Met Steel Landscape Edging: A Step-by-Step Install Guide
Ready to choose one?
About Caleb Morgan
Caleb Morgan is part of our editorial team and reviews and edits our lawn edging & trimming guides, checking product details against manufacturer specifications and owner feedback.