As an Amazon Associate I earn from qualifying purchases. This page may contain affiliate links.
Good ideas for landscape edging do two things at once: they draw a clean line between lawn and planting bed, and they keep grass, mulch and weeds where they belong. This guide walks through practical edging concepts, from simple mowing strips to raised stone borders, along with the material choices, measurements and install steps that make each one work. By the end, you will know which style fits your yard, how much room it needs, and what to avoid during installation.
Start With the Job Your Edging Needs to Do
Before you pick a look, decide what the border has to accomplish. Edging serves different purposes depending on where it sits, and the right choice changes with each goal.
Shopping for one? See our guide: Easyflex No Dig Landscape Edging Kit Review: Is It Worth It?. For another angle, check out Flower Garden Edging Ideas: 9 Options That Define Your Beds (2026).
- Containing mulch: A border a few inches above grade, with a lip that stops wood chips from spilling onto the lawn.
- Stopping grass creep: A barrier buried 4 to 6 inches deep so turf roots cannot tunnel into the bed.
- Defining a shape: Curves, circles or straight runs that give the yard a designed look.
- Allowing mower access: A flush or near-flush edge so the mower wheel can ride over it without scalping the turf.
- Retaining soil: On slopes or raised beds, a border that holds back soil and mulch.
If your main concern is grass, a buried barrier beats a decorative surface edge every time. If you mainly want a crisp look, a raised stone or paver border may be the better fit.
Nine Landscape Edging Ideas by Style
1. Mowing Strip with Pavers
A row of concrete pavers set flush with the lawn creates a mowing strip. The mower wheel rolls across the pavers, which keeps the grass edge sharp without hand trimming. Lay pavers on a 1-inch bed of compacted sand or stone dust, with joints kept to about 1/8 inch so trimmer line cannot slip into the gaps.
2. Natural Stone Border
Flagstone, fieldstone or river rock set in a row gives a relaxed, informal line. Bury about one-third of each stone below grade so it looks anchored and does not rock. Stones that vary in size look more natural than a uniform row. Plan on setting the largest stones at corners and curves.
3. Steel or Aluminum Strip Edging
Thin metal strips, typically 4 to 5 inches tall, disappear into the ground and hold a very crisp line. They work well for curved beds and suit a modern, minimal yard. Buried steel is the more rigid option, while aluminum is lighter and easier to bend by hand. Check that the top edge sits level with or slightly below the lawn.
4. Poured Concrete Curb
A poured curb gives you a permanent, sculpted edge that can be formed into almost any shape. Many homeowners use a simple wood form and reinforce the concrete lightly with rebar or wire mesh. A common profile is about 4 inches wide and 4 to 6 inches tall. Because concrete cures slowly and is difficult to undo, mark the layout with spray paint or a garden hose before you pour.
5. Wood Timber Border
Pressure-treated landscape timbers or rough-cut logs give a rustic, warm look. Stack them two high for a raised bed edge, or set a single timber level with the soil for a subtle line. Use galvanized spikes or rebar stakes, drilled through the timbers, to pin them in place. Wood will eventually rot, so choose ground-contact-rated lumber if the timber touches soil.
6. Brick Soldier Course
A soldier course sets bricks upright, end to end, along the border. It is a traditional look that works well in front of colonial or cottage-style homes. Set each brick about 2 inches deep in a sand bed and check the top line with a string level as you go.
7. Faux or Decorative Stone Edging
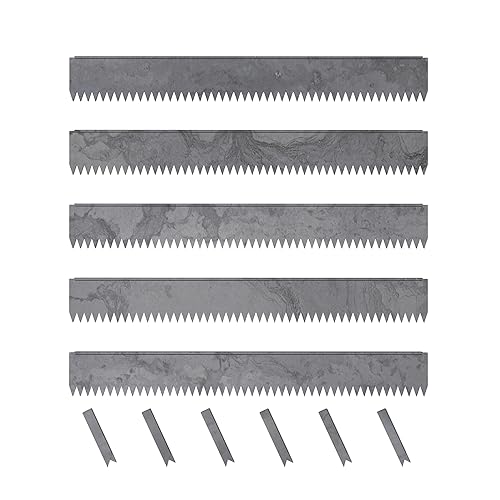
Interlocking faux stone panels mimic natural rock while staying lightweight and uniform. They are easy to install for a DIY project and come in multiple colors. Look for systems with built-in locking tabs so the sections stay aligned when you backfill.
8. Living Edge with Plants
A low, dense planting such as boxwood, liriope or dwarf juniper can serve as a living border. It defines the bed and softens hard lines. Plant on a spacing of roughly half the mature width so the row fills in within a season or two. Living edges need pruning to keep their shape, so they demand more upkeep than hardscape options.
9. Hammer-In Plastic Edging
Plastic edging with a stake or spike system is the most budget-friendly route and is simple to install. It works best for containing mulch and light grass control. Expect it to look less permanent than stone or metal, and watch for heaving after freeze-thaw cycles in colder climates.
Choosing Materials and Measurements
Once you have a style in mind, match the material and dimensions to the site. The table below summarizes common options.
| Edging type | Typical height above grade | Burial depth | Best use |
|---|---|---|---|
| Metal strip | 0 to 1 inch | 3 to 4 inches | Grass control, curves |
| Paver mowing strip | Flush | 1 to 2 inches (base) | Mower access |
| Natural stone | 3 to 6 inches | 1/3 of stone height | Informal beds |
| Poured concrete | 2 to 4 inches | 4 to 6 inches | Permanent curves |
| Landscape timber | 4 to 12 inches | Per install method | Raised beds, slopes |
| Plastic hammer-in | 1 to 4 inches | 3 to 4 inches | Mulch containment |
For any buried edging, the wider the root zone you need to block, the deeper the barrier should go. Turf roots commonly reach 3 to 4 inches deep, so a 4-inch burial is a reasonable minimum for grass control.
How to Install a Clean Edge: Step by Step
- Lay out the shape with a garden hose or spray paint. Step back and check the curve from several angles before you cut.
- Measure the bed width and check that curves have a radius you can actually cut or bend the material to.
- Dig a trench along the line, slightly deeper than the edging needs to be buried.
- Add a compacted base of sand or crushed stone where the material requires one, usually 1 to 2 inches.
- Set the edging, checking height with a string line and a level.
- Secure it with stakes, spikes or landscape adhesive, spacing anchors about 12 to 18 inches apart on straight runs and closer on curves.
- Backfill along the outside of the edging and tamp soil firmly so nothing shifts.
- Lightly water the area and walk the line, correcting any high or low spots before the soil settles.
Tools You Will Need
- Flat spade and trenching shovel
- Four-foot level and string line
- Rubber mallet or tamper
- Stakes, spikes or landscape fabric pins
- Garden hose or marking paint for layout
Common Mistakes to Avoid
- Setting edging too high: A border that stands well above the lawn traps clippings and makes mowing awkward. Keep most lawn-side edges within an inch of grade.
- Skipping the base: Pavers and stone without a compacted bed heave and sink.
- Too-tight curves: Rigid materials crack or kink on tight radii. Use flexible metal or cut shorter sections.
- Shallow burial: Grass roots and some weeds grow under shallow barriers.
- Ignoring drainage: A solid border can dam water against a bed. Leave gaps or weep spaces where runoff needs to pass.
Tips for a Long-Lasting Border
- Install edging when the soil is moist but not saturated, so it digs and tamps easily.
- Mark the line in sections and check each one before moving on.
- Use a consistent edge height across the whole yard unless you are intentionally creating a raised feature.
- Re-check fasteners and high spots each spring after freeze-thaw cycles.
If you are weighing options side by side, Best Landscape Edging for Mulch and Grass Control: 5 Edging Compared offers a useful comparison for containment-focused projects. For a traditional look, Wood Landscape Timber Edging: A Step-by-Step Install Guide walks through a complete timber install. Homeowners drawn to stone may also find Top 7 Landscape Edging Faux Stone Options for Clean Garden Borders helpful when choosing a lookalike product, and Steel Edging for Landscape: 7 Best Picks for Clean Lines (2026) covers the metal strip route in depth.
Recommended gear
A few supplies make the install cleaner and more durable.
- Landscape spikes or stakes: Hold metal and plastic edging firmly in place without shifting after rain. View on Amazon
- Four-foot level: Keeps the top line even across long runs and curves. View on Amazon
- String line and stakes: Gives you a straight reference for setting height and alignment. View on Amazon
- Landscape adhesive: Useful for securing paver or stone edging on hard bases where spikes will not fit. View on Amazon
FAQ
What is the most popular landscape edging idea?
Metal strip edging and natural stone borders are among the most common choices because they look clean and hold up well. The best pick depends on whether you prioritize grass control, mower access or a particular look.
How deep should landscape edging be buried?
For grass control, aim for 4 to 6 inches of burial depth. Shallower installs work for mulch containment, where the goal is only to hold wood chips in place.
Can I install landscape edging myself?
Yes, most edging types are reasonable DIY projects. Metal, plastic, stone and timber all suit a weekend install. Poured concrete takes more planning and skill, and a professional may be worth consulting for large or complex curves.
What is the best edging height for a lawn?
For lawn-side borders, keep the top within about 1 inch of grade, or set it flush so the mower can ride over it. Taller edges work only for raised beds or retaining purposes.
Does landscape edging stop weeds?
Edging alone does not stop weeds, but it blocks rhizomes and runners from crossing into beds when buried deeply. Pair it with landscape fabric or mulch for better weed control.
How do I edge around curves?
Use flexible materials such as thin steel or aluminum, or cut shorter pieces of rigid edging to follow the arc. Mark the curve with a hose first and keep the radius generous enough for the material.
What is a low-maintenance edging option?
Buried metal, poured concrete and stone generally need the least upkeep. Living edges with plants require regular trimming, so they suit gardeners who enjoy routine care.
When is the best time to install landscape edging?
Spring and early fall are ideal because the soil is workable and temperatures are moderate. Avoid installing in frozen or waterlogged ground.
Conclusion
The right ideas for landscape edging balance appearance, function and upkeep. Start by identifying the job your border must do, then choose a material and depth that suits your yard. A careful layout, a firm base and proper burial depth will keep your lines crisp for years.