As an Amazon Associate I earn from qualifying purchases. This page may contain affiliate links.
Landscape edging and borders give your beds a defined shape, keep mulch and soil where they belong, and make mowing far easier. In this guide you will learn how to plan the border, choose an edging material that suits your site, install it in the right order, and avoid the errors that cause heaving, gaps and sagging lines. The steps apply to lawn-to-bed transitions, walkways, patios and island beds alike.
What Landscape Edging and Borders Actually Do
Edging is the physical barrier, a strip of metal, plastic, stone, wood or concrete set at the edge of a planting area. The border is the planted or mulched zone it contains, including the band of plants, mulch or groundcover between the edging and the main bed. Many homeowners use the two terms interchangeably, but thinking of them separately helps when you plan. The edging controls where turf stops and the bed begins. The border determines how wide that visual zone is and what fills it.
Shopping for one? See our guide: 8 Best Heavy Duty Landscape Edging Options for Clean, Lasting Borders (2026).
A well-built line does three jobs. It stops grass roots from creeping into beds, it holds mulch and soil in place during heavy rain, and it lets a string trimmer or mower wheel run cleanly along the edge without chewing into plants. Bed lines that are planned around mowing paths and existing grade tend to hold their shape for years. Lines that were eyeballed on the day of install often need resetting within a season.
Step 1: Plan the Shape, Width and Grade
Start by mapping the bed on paper or with a garden hose. Curves are easier to mow around when the radius is at least as wide as your mower deck, and tight turns force you to trim by hand. Many landscapers suggest keeping curves gentle and avoiding sharp corners that are narrower than about 18 inches. Straight runs are simpler to keep sharp but can look rigid next to a flowing bed.
Decide on border width before you buy material. A typical planting border runs 2 to 4 feet deep. Narrower strips under 12 inches are hard to plant well and tend to look like an afterthought, while very wide beds can make a lawn feel smaller. Check the grade as well. Edging that sits on a slope can shift unless you add anchors or set it lower than the high side.
Use a garden hose or marking paint to outline the final line. Step back from several angles, including the view from a window or a walkway. Adjust until the curve feels natural and the mowing path is continuous.
Step 2: Choose the Right Edging Material
Material choice depends on how the bed will be used, how much you plan to mow, and the look you want. Here is a quick comparison of common options:
| Material | Best for | Key trade-off |
|---|---|---|
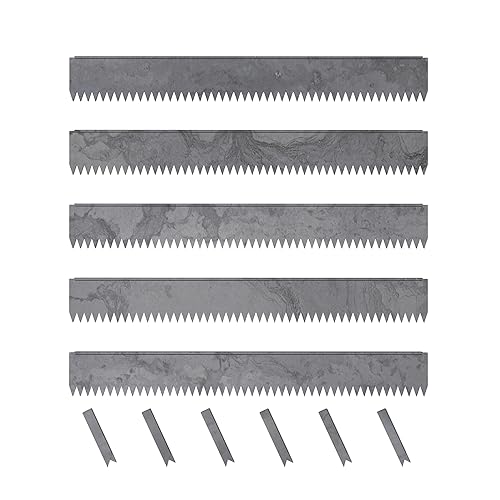
| Steel or aluminum strip | Crisp, modern lines and curves | Can be seen in the landscape and needs proper anchoring |
| Plastic or resin | Flexible curves and easy DIY installs | Lighter gauge may bend under heavy foot traffic |
| Natural stone or stone-look pieces | Cottage, rustic or stacked-wall styles | Heavier to haul and set level |
| Timber or landscape timbers | Raised, natural-looking beds | Wood breaks down over time, especially in contact with soil |
| Poured concrete | Permanent, clean curbs with a formal look | Hard to change once set and needs a formed trench |
If you want to compare specific product families in more depth, see Steel Edging for Landscape: 7 Best Picks for Clean Lines (2026) for metal strips and Heavy Duty Plastic Landscape Edging: How to Choose and Install It Right for resin options. For a natural look with wood, Best Landscape Borders for a Natural Look: 5 Wood Edging Compared covers the main choices.
Consider height as well. Many edgings are sold in 4 to 6 inch heights, while taller 12-inch pieces are used where you need to hold back a raised bed or deep mulch. Shorter edgings are easier to mow over but offer less retention. Taller units require more anchoring because soil pressure pushes outward against them.
Step 3: Gather Tools and Supplies
Having everything on hand before you start prevents the stop-and-go work that leads to uneven lines. A typical checklist includes:
- Garden hose or marking paint for layout
- Flat spade or half-moon edger for cutting the trench
- Level, preferably a 4-foot or longer straightedge
- Rubber mallet or hand tamper for seating pieces
- Landscape fabric (optional, for weed suppression behind the edging)
- Crushed stone or gravel base, roughly 2 to 3 inches deep for stable installs
- Anchor spikes or stakes sized for your material
- Tape measure and a utility knife for trimming fabric and sod
Step 4: Install the Edging Correctly
Cut the trench
Follow your painted or hosed line and cut a trench slightly deeper than the edging height. For a 4-inch edging, aim for a trench about 4 to 5 inches deep so the top sits just above the lawn surface. Keep the cut vertical on the bed side and the turf side so the edging can stand straight. Remove the sod and set it aside if you plan to reuse it.
Set a stable base
Spread a few inches of crushed stone or compacted gravel in the trench and tamp it. A base keeps the edging from settling and prevents frost heave in colder regions. Check the top edge with your level as you go, and make small adjustments to keep the line even from one section to the next.
Anchor and align
Lay each section against the base, then drive anchors through pre-punched holes or set stakes at the manufacturer’s recommended spacing. Overlapping or butting pieces can create gaps or lumps, so check alignment after every few feet. Curves often need closer anchor spacing than straight runs, so follow the product instructions closely.
Backfill and finish
Backfill soil on the bed side and tamp it firmly against the edging. Lay landscape fabric behind the edging if you are concerned about grass creeping under it, then add mulch or plant the border. On the turf side, backfill and firm the soil so the mower can run along the edge without dropping into a gap.
Step 5: Build the Border Zone
The border between the edging and your main planting should be designed, not left as bare dirt. Plant a row of low groundcover or edging plants, such as creeping thyme or dwarf liriope, to soften the transition. Keep taller plants at least 12 to 18 inches back from the edge so they do not hang over the line or crowd the mowing strip. Mulch in a 2 to 3 inch layer is a common finish because it suppresses weeds and holds moisture, but keep it a few inches off the edging so it does not wick grass seed into the bed.
For detailed planning of shape, width and plant placement, see Landscape Borders: Planning Shape, Width and Plants. If you are working with a raised bed, Landscape Timbers for Edging: 7 Best Picks Compared (2026) shows how timbers can hold back soil and mulch.
Step 6: Maintain the Line Over Time
Even a well-installed edge changes over time. Grass tends to creep, mulch settles, and freeze-thaw cycles push some materials up. Check the line each spring, and reset any sections that have shifted. Trim the grass along the edge with a string trimmer held at a slight angle so the line stays crisp. Plastic and metal edgings usually stand up to trimmers well, but wood can splinter if you hit it repeatedly, so keep the head a little away from the edge.
Common mistakes to avoid
- Installing edging flush with the soil without a base, which leads to heaving after winter.
- Skipping anchors or using too few on curves, so the line bows outward.
- Setting the top of the edging too high, which blocks the mower and trapped clippings collect behind it.
- Planning borders narrower than the mower or trimmer needs to run freely.
- Choosing a material that does not match the site, such as untreated wood in constant wet soil.
- Letting mulch pile against the edging, which hides the line and can encourage rot in wood.
Tips for a Cleaner Finish
- Install in cool, dry weather so the soil is firm and easy to cut.
- Use a long straightedge to check the top line every few feet, not just at the ends.
- Keep a consistent reveal height, usually 1 to 2 inches above the turf, for a uniform look.
- Lay out the full run before anchoring so you can catch awkward curves early.
- Consider a slight outward slope on the bed side of the trench so the edging pulls away from the bed a little, reducing lean.
Recommended gear
A few supplies make the job faster and the result more accurate. A long, sturdy level helps keep the top line even over long runs, and a half-moon edger gives a clean, vertical cut through sod. A hand tamper compacts the base and backfill, which prevents settling later. For ongoing upkeep, a string trimmer with a sharp, angled head keeps the edge crisp without damaging the material.
- Half-moon lawn edger: makes a clean, vertical cut along the trench line, which is easier to keep straight than a flat spade. View on Amazon
- Long torpedo level: checks the top of the edging over long runs so the line stays even. View on Amazon
- Hand tamper: compacts the gravel base and backfill, which reduces settling and heaving. View on Amazon
- Cordless string trimmer: keeps the grass edge clean along finished borders without the noise and fuel of a gas unit. View on Amazon
FAQ
How deep should landscape edging be installed?
Most edgings should be set so the top sits 1 to 2 inches above the lawn surface. The buried portion, usually a few inches, provides the stability. Check the manufacturer’s specification, since tall or heavy units may need deeper seating.
Do I need landscape fabric behind edging?
Fabric is optional but helpful if grass or weeds creep into the bed. It is most useful where turf and bed meet along a long run. Avoid fabric that blocks water if you have heavy clay soil.
What is the best width for a planting border?
Two to four feet is a common range for most beds. Narrower borders are hard to plant well, and very wide beds can overwhelm a small lawn. Choose a width that still allows comfortable mowing and trimming.
How often should landscape edging be reset?
Check it every spring and after heavy freezes or storms. Reset sections that have shifted, and clear grass or mulch that has built up against the top line.
Can I install edging on a slope?
Yes, but slopes need extra care. Set the edging lower on the uphill side, add more anchors, and consider a gravel base that drains well so water does not wash under the line.
Which edging lasts longest?
Steel, aluminum, poured concrete and stone generally last longer than untreated wood or thin plastic. Lifespan depends on climate, soil moisture and installation quality, so a well-anchored product often outlasts a poorly installed premium one.
Is professional installation worth it?
For long, complex or heavy materials such as concrete or large stone, a professional installer may be worth the cost and reduces the risk of costly mistakes. For simple metal or plastic runs, many homeowners install the edging themselves with basic tools. If you are unsure about structural retaining work over 12 inches, consult a professional landscaper.
Conclusion
Landscape edging and borders work best when the shape, width and material are chosen together and installed on a firm base. Plan the curve, match the material to the site, anchor it carefully, and maintain the line each season. With those steps, your beds will look sharp and stay defined for years.