 By Caleb Morgan
Updated November 2026
A metal blade lawn edger cuts a crisp, vertical line between turf and beds, walkways or driveways. In this guide you will learn how these blades work, how to choose and mount one, how to make a clean first pass, and how to keep the blade sharp so your borders stay sharp all season. Most of the work comes down to a few measurements and a consistent technique.
What a Metal Blade Lawn Edger Does Differently
A metal blade lawn edger uses a rotating steel disc or blade, usually mounted at the front of a powered unit, to slice through grass roots and soil at the lawn’s edge. Compared with the nylon line of a string trimmer, a steel blade delivers a firmer, more vertical cut. Nylon line tends to whip and leave a ragged, rounded profile, while a metal blade can shear the edge cleanly when the blade is sharp and the depth is set correctly.
The trade-off is control and safety. Metal blades are more aggressive, can throw debris, and will damage anything hard they hit, including landscape stones, irrigation heads and tree roots near the surface. Before you start, walk the edge and mark any obstacles.
Choosing the Right Metal Blade Lawn Edger
Blade type matters more than most buyers expect. Most metal blade edgers fall into two groups: straight-cut edgers with a flat, wide blade for crisp vertical edges, and rotary or curved-blade models that are better suited to tighter curves and rougher ground. Power source is the second decision, and it affects how much control you have over the blade speed and how long you can work without interruption.
Check these specifications before you buy: A related read: Best Lawn Edgers.
- Blade diameter: Larger discs cover more ground per pass but are harder to steer around tight curves.
- Cutting depth range: Look for an adjustable depth stop so you can set it to roughly 1 to 2 inches for typical edge work.
- Blade material and thickness: Heavier-gauge steel holds an edge longer and resists bending when it hits a root.
- Shaft and handle design: A comfortable, adjustable handle reduces fatigue on long edge runs.
- Blade replacement: Confirm that replacement blades are readily available for your model before you commit.
If you are comparing whole machines, the 6 Best Electric Lawn Edgers with Blade for Clean Lines (2026) roundup is a useful starting point. If you already own an edger and need a new cutting element, see 5 Best Lawn Edger Blades Replacement Options for Clean Edges (2026).
Tools and Supplies You Will Need
Gather everything before you start. Stopping mid-edge to hunt for a wrench or gloves breaks your rhythm and can lead to uneven cuts.
- Safety glasses and hearing protection
- Heavy work gloves and long pants
- Wrench or socket set matching the blade nut size (check your manual)
- Marking paint or a garden hose to lay out your line
- A flat shovel or spade for clearing debris and checking depth
- A file or sharpening tool suited to the blade
- A straightedge or string line for long, straight runs
Step-by-Step: Setting Up Your Metal Blade Lawn Edger
Step 1: Inspect and Mount the Blade
Disconnect the power source or remove the spark plug boot on gas models. Check the blade for cracks, bends and dull edges. Mount the blade with the cutting edge facing the correct direction, which your manual will show with an arrow. Tighten the retaining nut firmly, usually to the torque listed in the manual, and spin the blade by hand to confirm it runs true without wobble.
Step 2: Set the Cutting Depth
Most edging work calls for a cut about 1 to 2 inches deep. Set the depth stop or wheel height so the blade reaches the soil line without digging into the bed. A shallow pass leaves a lip of grass; a deep pass can gouge the bed edge and expose roots.
Step 3: Lay Out a Guide Line
Mark your intended edge with marking paint or a garden hose. For long runs, stretch a string line along the edge and cut to it. Curves look best when laid out with a smooth, continuous arc rather than short straight segments joined together.
Step 4: Make the First Pass
Start at a fixed point and walk at a steady pace so the blade cuts without bouncing. Keep the blade vertical and the shaft at a comfortable angle. Let the blade do the work instead of forcing it down. Overlap each pass slightly so no sections of grass are left standing.
Step 5: Clean Up and Check Your Work
Remove severed grass and soil from the bed and the walk using a shovel or stiff broom. Walk the edge and look for missed sections. A second light pass often cleans up the transitions where you started and stopped.
Maintaining the Blade for Clean, Consistent Edges
Sharpening the Blade
A dull metal blade tears grass instead of slicing it, leaving frayed edges. Sharpen the cutting edge with a file at the original bevel angle, working from the inside of the blade outward. Remove burrs, then balance the blade if it has a noticeable heavy side. Unbalanced blades cause vibration, which makes steady cutting harder and wears bearings faster.
Replacing a Worn or Damaged Blade
Replace a blade immediately if it has cracks, deep nicks or visible bends. Use a replacement that matches the original diameter, hole pattern and thickness. Consult a professional if you are unsure about compatibility or if the blade is damaged during a strike, as a failed blade can fly apart.
Storage
Clean the blade after each use to remove sap and soil. Apply a light coat of oil to prevent rust, especially if you live in a humid climate, and store the unit in a dry place.
Common Mistakes to Avoid
- Cutting too deep. A deep pass exposes roots and can scalp bed edges. Stay within the depth range the manufacturer specifies.
- Working with a dull blade. Dull blades tear and fray the grass. Sharpen or replace before the edges start looking ragged.
- Forcing the blade. Pushing hard makes the blade bounce and wander. Let the blade cut at its own pace.
- Skipping the obstacle check. Hitting a buried stone or sprinkler line can bend the blade or damage the drive system.
- Edging wet grass. Wet turf clogs the blade and leaves a smeared, uneven cut.
- Ignoring the guard. Metal blades throw debris. Keep guards in place and keep bystanders and pets well back.
Tips for Cleaner Lines
- Edge every four to six weeks during the growing season to prevent grass from creeping into beds.
- Cut when the soil is slightly moist but not muddy. Dry, hard soil dulls blades faster.
- Work in a consistent direction, usually clockwise around a bed, so your rhythm stays even.
- Keep a spare blade on hand if you have a large property, so a swap takes minutes instead of a trip to the store.
- For more technique details specific to a popular model, read Worx WG896 Lawn Edger: Setup, Use and Edge-Cutting Tips.
Recommended gear
A few items make the difference between a rough first attempt and a clean, repeatable edge.
- Worx WG896 Electric Lawn Edger — A widely sold electric edger that many owners use for straight, defined borders on small to mid-size lawns. View on Amazon
- STIHL FCB-KM Curved Lawn Edger Attachment — A curved-blade attachment that suits owners who already have a compatible STIHL power head and want clean curves along beds. View on Amazon
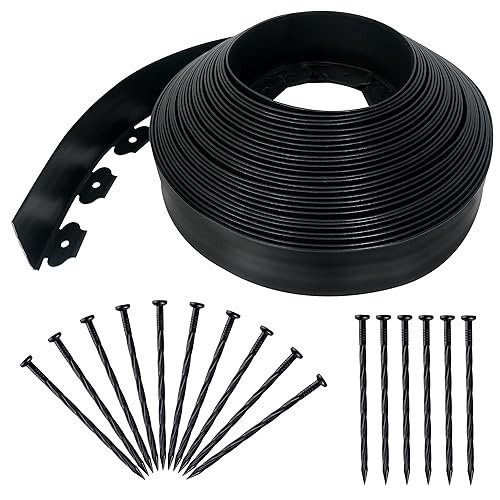
- Vigoro Metal Landscape Edging — Steel edging that holds a bed line in place and gives the lawn edger a firm guide to follow. View on Amazon
FAQ
What is the difference between a metal blade and a string edger?
A metal blade cuts with a rigid steel edge and produces a crisper, more vertical line. A string edger uses nylon line that flexes on contact, which is gentler on hard objects but leaves a softer, more rounded edge.
How deep should a metal blade lawn edger cut?
Most edge work is done at about 1 to 2 inches deep. Set the depth to reach the soil line without digging into the bed. Always follow the depth range in your manufacturer’s manual.
How often should I sharpen the blade?
Check the blade after every few uses. Sharpen it when the edges start to look frayed or when the cut becomes ragged. Frequent use on hard or dry soil means more frequent sharpening.
Can a metal blade damage landscape stones or sprinkler heads?
Yes. A metal blade can chip stone, bend or break sprinkler heads and cut irrigation lines. Mark buried obstacles before you start and keep the blade clear of them.
Is a metal blade lawn edger safe for beginners?
It can be, with the right precautions. Wear eye and hearing protection, keep guards in place, and practice on a small, obstacle-free section first. If you are unsure about handling a powered blade, consult a professional or the manufacturer’s safety instructions.
How do I replace a metal edger blade?
Disconnect the power source, remove the retaining nut, swap the blade for one with matching diameter and hole pattern, and tighten the nut to the manufacturer’s specification. Spin the blade by hand to confirm it runs without wobble before reconnecting power.
Should I cut edges when the grass is wet?
No. Wet grass clogs the blade and produces a smeared, uneven edge. Wait until the turf is dry, and cut when the soil is slightly moist rather than muddy.
How do I keep edges looking clean between cuttings?
Edge every four to six weeks during the growing season, and use a light pass to clean up stray runners. Consistent maintenance keeps the line clear and prevents grass from creeping into beds.
Conclusion
A metal blade lawn edger gives you a sharp, vertical border when the blade is sharp, the depth is set correctly and the technique is consistent. Choose the right blade type for your yard, set up the blade carefully, and maintain it between uses. With a little practice, your edges will hold their shape from one cutting to the next.
Related reading
- Blade for Lawn Edger: How to Choose, Fit and Replace It for Clean Edges
- Worx WG896 Electric Lawn Edger: Setup, Use and Edge-Cutting Tips
Ready to choose one?
About Caleb Morgan
Caleb Morgan is part of our editorial team and reviews and edits our lawn edging & trimming guides, checking product details against manufacturer specifications and owner feedback.